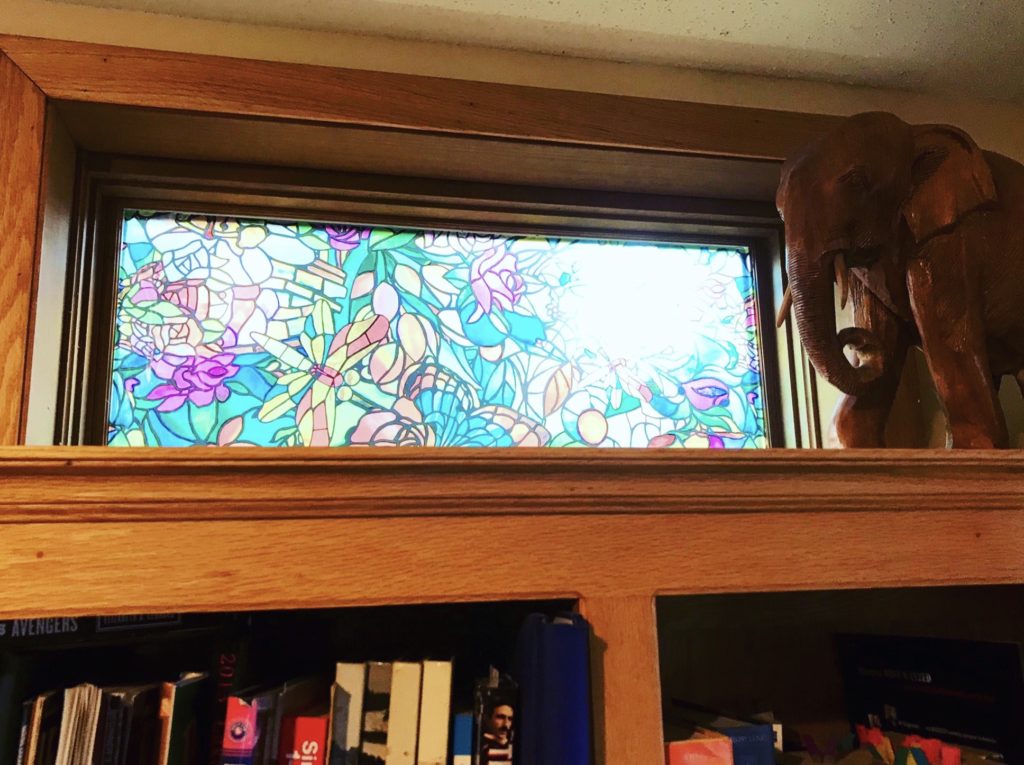
So easy that this non-DIYer could do it – in only eight steps

This post contains references to products from one or more advertisers. I only post products I recommend and use myself. As an Amazon Associate, I earn from qualifying purchases, and may receive compensation when you click on the links and purchase those products. You will not accrue any extra costs.
Full disclosure – I am not a home improvement DIYer. I just don’t have the talent or skillset or time or patience. I typically hire people for things like that.
But this stained-glass privacy window project was so simple, even I could do it.
And, I did.
This post is a little off my normal travel post topics, but falls within the lifestyle category. And it kind of ties in with my writing and blogging because that is exactly what I was supposed to be doing yesterday. But on a whim decided to install the stained-glass privacy film on the windows above our bookshelves that I’ve been meaning to do for awhile. My Amazon order history indicated I had purchased the product a couple of years ago.
It was so quick and easy to install that no step-by-step images were required.
Well, that and I hadn’t planned to blog about it when I started.
Step 1

I dusted and vacuumed the windows, the sill and the top of the bookshelves (must admit it had been a while since that area had experienced any human interaction).
And for all you Chicago Bear and Kansas Jayhawk fans, yes, that is my family posing with the NFL great / Kansas Comet Gale Sayers (who we happened to run into on our family-friendly vacation in Vegas – watch for a travel post coming soon).
Step 2

I cleaned the windows with Gila GTA002 Window Film Solution. You can also use it during the film application. While I used it during the application for a previous larger project, I didn’t need to use for this smaller install.
Step 3
I measured the windows. Note: Before purchasing your privacy films, measure the windows so you have the correct size. For these special windows, I ordered the Self-Adhesive Privacy Glass Window Film, Spring Chapel/Tulia, 17″ x 78″ Roll. (Note that it comes in a 3-pack.)
Step 4

The back of the film rolls include trimming guidelines, which are very helpful. However, these particular windows were custom-made so they didn’t have typical window measurements. I simply marked the measurements on the back of the film with a pen.
Step 5

I cut. You can use scissors or a special utility knife/trimmer to trim the film. The Gila Window Film Complete Installation Kit includes a trimmer, lint-free cloth, a bottle of application solution (as well as a squeezee/hard plastic card as noted in step 7).
Step 6
So quick and easy to install – just peel and stick. I unpeeled a little at a time to make it more manageable. If you do larger windows or glass doors, you may need a partner to help out. Don’t worry if you make a mistake as you can easily unpeel it and start over (and the films continue to stick even after you unpeel).
Step 7
To avoid bubbles and creases, use a flexible card squeezee to smooth it out. I ordered the Gila Window Film Complete Installation Kit, which includes the squeezee (as well as the trimmer as noted in step 5).
Step 8

Voila! Enjoy your new stained-glass privacy windows.

The privacy film I installed still allows sunlight through yet provides UV protection of 95%, reduces glare and provides privacy to block unwanted viewing or lights (our neighbors installed a motion-detector light on their garage so it would turn on frequently and stream through our window).
What I also love is that there is no adhesive, and is easy to remove without any residual.
And it looks professionally installed. Feeling pretty accomplished even though it really didn’t take that much effort. I think writing this blog post took longer.

Here is an image of a similar project I did a couple of years ago on our glass door that leads out to our deck. It features Coavas Non-Adhesive Window Film Stained Glass Window Film Static Frosted Privacy Film for Home Bathroom Living Room, GF-WF-90-2 35-inch by 78.7-inch.
Recommended stained-glass privacy window products
Note: Before ordering your privacy films, measure your windows so you order the correct size. The products listed below are the ones I used in the two projects featured in this post.
Self-Adhesive Privacy Glass Window Film, Spring Chapel/Tulia, 17″ x 78″ Roll (Note that it comes in a 3-pack.)
Gila Window Film Complete Installation Kit
Gila GTA002 Window Film Installation Solution (Note: The solution comes with the Gila Window Film Complete Installation Kit so no need to order extra.)
Stanley 33-425 25-Foot by 1-Inch Measuring Tape
As an Amazon Associate I earn from qualifying purchases.


So cool! I never even imagined one could turn windows into stained glass like that. And it seems easy enough that even I could do it!
Thanks for sharing.
Karen | https://OurCarpeDiem.com
Wow! This looks amazing. Thanks for sharing.
Wow, this is stunning. I’d love to try something like this at home. Thanks for the tutorial.